Dental Laboratory
The success of any dental practice hinges on delivering consistent, high-quality patient care. Every crown, bridge, veneer, and denture must not only fit perfectly but also appear natural. For this reason, collaborating with a reliable dental laboratory becomes a cornerstone of clinical excellence. Many dentists experience setbacks due to ill-fitting prosthetics, unexpected remakes, or aesthetic failures. These issues erode patient trust and can result in costly do-overs. A well-equipped, communicative lab acts as a clinical partner rather than a passive vendor.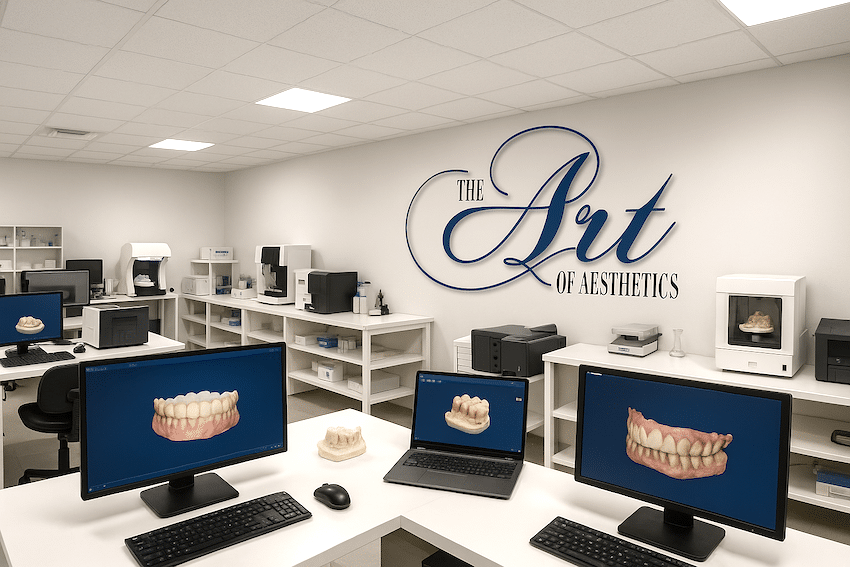
The Foundation of Quality Dentistry
Furthermore, dentists who streamline case communication with lab technicians enjoy greater treatment predictability. Case planning becomes a team effort, which minimizes chair time and patient discomfort. Through this partnership, dentists can also access the latest materials and technologies without investing heavily in equipment.
Therefore, building a solid relationship with a capable dental laboratory is not optional; it is vital.
Reducing Chairside Errors and Remakes
A consistent and skilled laboratory contributes significantly to lower chairside errors. When technicians understand your preferences, they tailor restorations with precision and accuracy. This reduces the number of adjustments needed during delivery appointments and builds patient satisfaction.
Additionally, errors in shade matching or occlusion adjustments create unnecessary time loss. A poor fit not only frustrates the patient but also burdens the dentist with additional labor. With a dedicated dental laboratory, these issues diminish because of standardized communication and case protocols.
Moreover, having a designated point of contact within the lab ensures your questions are addressed promptly. You're not just a number in the queue. You're a partner whose success reflects on theirs. So, when urgent cases arise, a trusted lab can often prioritize your needs. Consequently, the value of a dependable dental laboratory grows more apparent with each clinical case.
Staying Competitive in a Crowded Market
Dentistry is more competitive than ever. Patients now compare offices not only by chairside manner but also by treatment speed and outcome longevity. Partnering with an efficient dental laboratory enables offices to meet these expectations. Indeed, labs that invest in CAD/CAM systems and 3D printing offer faster turnaround times. In turn, this translates to fewer patient visits and more favorable online reviews. It can also reduce overhead by minimizing chair time and consumables.
Moreover, offices that advertise high-quality restorations supported by digital workflows gain a marketing edge. A dental team that confidently stands behind its work builds brand trust. This is difficult to achieve when partnering with a generic or inconsistent lab. As a result, working with a progressive dental laboratory directly impacts your practice's public image and business growth.
Adaptation to Evolving Materials and Techniques
Material science in dentistry evolves rapidly. Labs that stay current offer clinicians a wide range of biocompatible, aesthetic, and durable options. These improvements often rely on training and technological upgrades, which a reputable dental laboratory consistently pursues. Thus, you gain access to lithium disilicate, zirconia, hybrid ceramics, and other cutting-edge materials through the lab's investment. When your lab offers guidance on which material suits a case best, treatment becomes safer and more predictable. Also, as techniques evolve—such as guided implant placement or digital impressions—labs must adapt. If they fall behind, your practice also risks falling behind. Innovation only works when both clinician and technician evolve in parallel. Hence, choosing a technologically forward dental laboratory future-proofs your clinical offerings and keeps your practice agile.
A Successful Case for Cosmetic Veneers
Begin with Clear Aesthetic Communication
A successful cosmetic veneer case starts long before tooth preparation. It begins with understanding the patient's aesthetic goals in detail. A dentist must extract this vision through a well-structured consultation and document it clearly for the dental laboratory. Photos are essential. Provide full-face, smile, retracted, and profile images to help the lab interpret proportions, symmetry, and facial context. Shade tabs should be photographed under natural light and labeled clearly. The better the visual data, the more accurate the outcome. Also, written instructions must include the patient's aesthetic desires in plain terms. Words like "natural," "youthful," or "bold" need clarification. Describe the incisal translucency, surface texture, and value preference. Include the age and personality of the patient as context.
Additionally, a diagnostic wax-up or digital smile design preview helps align vision and reality. This step guides both the preparation and the design for the dental laboratory.
Provide Ideal Preparations with Uniform Reduction
Precise preparations are critical. Uneven reduction forces the ceramist to compensate by adjusting thickness or shade, which can compromise aesthetics or durability. Strive for uniform enamel reduction, typically 0.75 mm labially and 1.2 mm incisally. Use reduction guides created from the wax-up to stay within safe boundaries. Over-preparing exposes dentin, while under-preparing can lead to over-contouring. Both outcomes undermine the long-term success of veneers. Moreover, margin placement plays a major role in the final appearance. Feathered or knife-edge margins create challenges in masking and bonding. Chamfer or light shoulder margins placed supra-gingivally offer control and preserve tissue health.
Importantly, take final impressions or scans only after achieving dryness and soft tissue retraction. Digital scans should capture clear margins and arch context. This digital clarity enhances precision at the dental laboratory level.
Use a Provisional Veneer That Guides the Final Design
Provisional restorations are more than temporary placeholders. They act as a real-world preview for both the patient and the lab. When fabricated from the diagnostic wax-up, they help test phonetics, function, and esthetics. If patients love the provisionals, take detailed photos and a copy of the mock-up for the lab. If not, record the changes requested and communicate them. This feedback loop refines the final product and saves time during delivery.
Furthermore, provisionals can guide the ceramist in replicating incisal edge position, line angles, and contours. Inconsistent provisionals or no provisionals create guesswork and increase remakes. Thus, a collaborative approach between the dentist, the patient, and the dental laboratory improves final veneer accuracy and patient satisfaction.
Select the Right Material for the Veneer Type
Cosmetic veneers come in various materials, such as feldspathic porcelain, lithium disilicate, or hybrid ceramics. The choice depends on the patient's bite, prep thickness, shade, and translucency goals.
For highly translucent results, feldspathic offers unmatched layering beauty. However, it's technique-sensitive and brittle. On the other hand, lithium disilicate (like IPS e.max) strikes a balance between strength and esthetics, especially in minimal-prep cases. The Art of Aesthetics no longer supports no-prep veneers. Also, match the material with cement shade options. A warm-toned cement may ruin a cool-toned restoration. The lab requires this information upfront to control the final color through layering and thickness.
Additionally, discuss whether the veneers require pressed or cutback techniques. Each method has different aesthetic potentials. Once the material and technique are confirmed, the dental laboratory can align more precisely with your vision.
Final Checks: Shade Try-In and Insertion Protocol
Before bonding, conduct a try-in appointment using water-soluble try-in pastes that simulate cement shade. This lets you and the patient approve shape, value, and fit without commitment. At this point, small adjustments to shape or surface texture are possible. Document any refinements and share feedback with the lab for future cases. A clear feedback loop makes each case better than the last. Moreover, bonding should follow strict isolation and adhesive protocols. Avoid contamination at all costs. Veneers should be thoroughly cleaned with alcohol or an ultrasonic bath before bonding. After cementation, polish margins with fine-grit rubber points and ensure occlusion is checked both in static and dynamic movement. Post-insertion photos provide both satisfaction documentation and reference for the dental laboratory.
Our Preferred Material for Cosmetic Makeover is IPS e.max Layered Veneers, Crowns, and Bridges.
Introduction to IPS e.max Layered Restorations. IPS e.max is a lithium disilicate glass-ceramic known for its outstanding aesthetics and strength. It has become the gold standard for cosmetic restorations. Also, this material offers a natural translucency that mimics real enamel. When layered by skilled ceramists, it replicates the depth and vitality of a natural tooth. Moreover, IPS e.max is ideal for anterior cosmetic cases where appearance is paramount. The material is strong enough for posterior crowns as well. Layering ceramics over a pressed core enhances light reflection and surface texture. From the dental laboratory point of view, IPS e.max allows consistent control over shade, opacity, and contour customization.
Why IPS e.max is Ideal for Veneers
Veneers demand thin but strong restorations with precise color control. IPS e.max satisfies both structural and aesthetic requirements. Also, the material's flexural strength (400 MPa) allows minimal tooth reduction, preserving natural enamel. Moreover, e.max veneers can be fabricated as thin as 0.3 mm, albeit compromising durability. Also, layering adds internal characteristics, halo effects, incisal translucency, or subtle mamelons. The dental laboratory achieves lifelike results with IPS e.max using custom shade selection and contouring protocols. As such, cosmetic dentists appreciate its ability to blend seamlessly with the surrounding dentition.
IPS e.max Crowns and Posterior Solutions
Though known for veneers, IPS e.max also works well for full-coverage crowns in both anterior and posterior regions. Also, it provides enough strength to resist fracture under normal function, making it suitable for single-unit posterior crowns. Moreover, pressed e.max crowns maintain excellent marginal integrity and long-term durability. Additionally, for patients concerned with esthetics in premolars and first molars, layered e.max crowns offer a balance of beauty and function. The Art of Aesthetics Dental Laboratory utilizes press techniques to deliver crowns that fit accurately with minimal adjustment.
IPS e.max Bridges for Select Indications
While not intended for long-span bridges, IPS e.max supports 3-unit bridges in the anterior region where occlusal forces are lower. Also, bridge frameworks must meet design criteria, no cantilevers, bruxers, or long pontics. Proper prep spacing is essential. Moreover, using IPS e.max in bridge cases offers consistent color matching with adjacent veneers and crowns. Additionally, light transmission across the entire prosthesis maintains harmony in smile makeovers. When esthetics outweigh high-stress needs, this material is a viable alternative to zirconia or metal-ceramics. The dental laboratory confirms bridge feasibility through digital planning and mock-up try-ins.
Pitfalls to Avoid Restoring Dental Implants
Inaccurate Implant Positioning Leads to Long-Term Failure
Proper implant placement is critical to restoration success. One of the most common pitfalls occurs when implants are placed without restorative input. The resulting angulation may appear ideal radiographically, but it can compromise aesthetics or hygiene. From a dental laboratory perspective, off-axis implants create restorative complications. For example, when implants are tilted too far buccally or lingually, it becomes difficult to design a prosthesis that is both functional and aesthetic. Screw-access holes may emerge on incisal edges or facial surfaces, leading to esthetic compromise. Moreover, poorly positioned implants limit restorative material choices. Zirconia frameworks, for instance, have limited ability to compensate for extreme angles. A lab technician must either overbuild contours or introduce bulk to ensure strength. Therefore, early collaboration between the clinician and the dental laboratory avoids positional errors and sets the foundation for prosthetic success.
Ignoring Soft Tissue Contours Compromises Esthetics
A frequent oversight during implant restoration is neglecting the peri-implant soft tissue profile. The emergence profile should mimic a natural tooth, yet it often ends up too narrow or bulbous. This affects both aesthetics and tissue health. Additionally, the contour between the implant and the crown base must support the papilla and the gingival margins. Without custom healing abutments or provisional shaping, tissues can collapse or become fibrotic. This makes the final restoration appear "fake" or over-contoured. Photographs showing the soft tissue pre- and post-provisionalization are crucial. These guide the ceramist in sculpting emergence profiles that blend seamlessly. Even the shade of the underlying titanium or zirconia abutment should be considered to prevent gray show-through.
Furthermore, a clear understanding of the mucosal biotype can impact material selection. For thin tissue, labs often prefer zirconia abutments over metal to prevent dark shadows. A communicative dental laboratory will request this information to optimize results.
Miscommunication on Components Causes Delays
Implant systems vary widely. Without specifying exact components—brand, platform, connection type—the lab can't begin fabrication. Sending only a scan body without system identification is a common mistake. This delays production and increases the risk of misfit. Also, sending inaccurate or unverified scans can derail timelines. Many dentists assume intraoral scans automatically capture the correct connection depth. However, slight misalignments of scan bodies lead to errors in digital workflows. A model that doesn't seat properly is a red flag.
Furthermore, the torque values, abutment selection, and screw compatibility must be confirmed. When dentists assume the lab "already knows," the result is rework or emergency communication.
Thus, clear documentation of components—either digital or written—helps the dental laboratory stay on track and meet deadlines without compromising quality.
Using Generic Abutments Risks Biomechanical Failure from a Dental Laboratory Perspective
Generic or non-original implant components can introduce unexpected failures. While they may reduce upfront costs, the long-term risk includes screw loosening, micro-gaps, and fracture. Labs observe that mismatched tolerances often cause inconsistent seating. In fact, torque discrepancies alone can destabilize a well-fitting crown. When abutments don't match implant platforms perfectly, stress accumulates at the interface. Over time, this results in mobility or complete detachment.
Moreover, insurance and warranties may be voided when non-original parts are used. If a patient's implant fails, the dentist may bear liability. For this reason, The Art of Aesthetics often refuses cases involving unauthorized third-party parts. Also, radiographic verification of seating is essential. A marginal gap may not be visible clinically but becomes obvious under X-ray. Technicians rely on these images to ensure compatibility. Consequently, a high-quality dental laboratory such as The Art of Aesthetics will advocate for original components and confirm fit at every step.
Overlooking Occlusion and Functional Load
Occlusion is often the last thing considered, but one of the most important. An implant crown with improper occlusal design can fracture, loosen, or cause bone resorption. Unlike natural teeth, implants don't have periodontal ligaments and can't absorb shock. Additionally, occlusal contacts should be lighter on implants compared to natural teeth. Labs need to know the opposing dentition and whether the patient has parafunctional habits. Nightguards may be recommended post-delivery, especially for bruxers. Also, materials matter. Full-contour zirconia may be too rigid in some cases. Layered ceramics offer better absorption but require more occlusal clearance. A good lab will advise based on bite forces and opposing material. Moreover, don't assume the articulator setting alone solves everything. Mounting errors lead to premature contacts, especially in large span cases. Always provide accurate bite records and include a verified vertical dimension. Accordingly, a collaborative dental laboratory minimizes occlusal failures through precision and communication.
Clinical Precision with Screw-Retained Implant Restorations from a Dental Laboratory Perspective
Advantage of Screw-Retained Implant Restoration but Not Always Ideal Without Utilizing a Complicated Angled Screw and Screw Driver. Also, Why Cement-Retained Is More Suitable.
Screw-retained restorations offer several advantages for both clinicians and patients. They provide retrievability, eliminate excess cement, and improve long-term maintenance. For many dentists and their supporting dental laboratory, this method is preferred when possible. Because there is no cement involved, the risk of peri-implantitis caused by residual cement is significantly reduced. This is particularly important in deep subgingival margins, where cement cleanup is nearly impossible. Additionally, screw-retained crowns allow for easy access during repairs or complications. This feature minimizes trauma during removal and promotes implant longevity. Also, the precise control over torque delivery ensures a stable connection between the abutment and implant. Unlike friction-fit systems, screw retention allows the clinician to verify and confirm fit before final seating.
However, ideal screw-channel emergence requires perfect implant angulation.
This isn't always possible in clinical situations, even with digital planning. In such cases, the dental laboratory may struggle to avoid facial or incisal access holes.
Angled Screws and Custom Drivers Complicate Execution
To overcome poor angulation, angled screw channel (ASC) technology has become more common. The use of ASC requires dentists to have experience, skills, and extensive training. If you have never done this before, avoid it until you receive formal training. These systems redirect the screw access pathway, allowing for improved esthetics and positioning. Still, they introduce technical complexity. Special drivers must be used, and torque delivery becomes less intuitive. Moreover, ASC designs require precise planning and compatibility between components. A slight deviation in insertion path may cause screw stripping or incomplete seating. Dentists must ensure their torque wrench and driver system are compatible with the implant platform and screw design. Additionally, access holes can weaken ceramic restorations. Even with zirconia, redirecting the screw channel risks creating stress points that compromise strength over time. This concern is magnified when the crown is narrow or the access path travels through a thin incisal structure. In addition, it leads to higher lab fees, longer turnaround, or reduced prosthetic options.
Limited Use Cases for Screw-Retained Restorations
There are several scenarios where screw-retained designs are simply not feasible. Implants placed in posterior segments with extreme mesial or distal tilt often result in screw channels exiting in unesthetic or functionally challenging locations. Also, limited interocclusal space restricts access to torque drivers. When vertical clearance is tight, delivering the correct angle and force without damaging the restoration becomes difficult. In such cases, even ASC systems may fall short.
Additionally, esthetically driven anterior cases demand invisible or lingual screw access. Achieving this without compromising implant osseointegration is rare unless the placement was ideal. Therefore, even if ASC is available, some clinicians choose cement-retained for a cleaner facial appearance.
Moreover, retrievability isn't always needed. When implant restorations are predictable and free from complications, removing them later becomes unnecessary.
In these instances, a cement-retained design offers simplicity. Thus, for many cases, the dental laboratory may recommend a cement-retained solution despite the retrievability benefits of screw-retained options.
Why Cement-Retained Restorations Are Often Preferred
Cement-retained restorations offer flexibility in design and improved esthetics. Since there is no access hole, the ceramist can craft seamless incisal or occlusal surfaces. This leads to a more lifelike appearance, especially critical in the anterior zone. Additionally, cemented crowns can be used with stock abutments or custom titanium and zirconia abutments. Thisallows more control over the emergence profile and tissue shaping. When soft tissue architecture is a concern, a properly contoured abutment can create ideal support. Moreover, the process is less technique-sensitive. Unlike ASC systems, cemented restorations don't require specialized screwdrivers or torque protocols. As long as cement is applied properlyand excess is removed, the outcome is predictable and aesthetic. Also, some dental laboratory technicians favor cement-retained designs for their ability to deliver high-strength restorations without compromising internal fit due to complex screw mechanics.
Overcoming Cement-Related Risks with Modern Techniques
Historically, cement-retained implants have been criticized for promoting peri-implant disease due to residual cement. However, newer protocols have made this preventable. One effective approach is extraoral cementation. With this method, the crown is cemented onto the abutment outside of the mouth. Excess is cleaned completely, and the unit is then seated as one piece. This virtually eliminates subgingival residue. Additionally, newer cements are radiopaque and retrievable, reducing long-term risk. Furthermore, placing margins supragingivally helps detect and remove any residual material. In esthetically critical areas, zirconia abutments can be customized to maintain translucency while raising the cement margin.
Also, when done in collaboration with a meticulous dental laboratory such as The Art of Aesthetics, abutments are designed with chamfer or shoulder margins that enhance seating and cement control. This partnership minimizes complications. Thus, when clinicians follow proper cementation techniques, the risks can be almost entirely mitigated, making cement-retained options both safe and effective.
Aesthetic Demands and Material Limitations
Screw access holes often interfere with the esthetic demands of anterior implants. Even when located lingually, access channels may reflect through thin ceramic. This becomes especially problematic in patients with high smile lines. Also, closing access holes with composite or porcelain leaves a visible outline over time. These repairs often discolor, fracture, or compromise occlusion. Cement-retained crowns, by contrast, avoid these challenges entirely.
Furthermore, ceramic strength can be compromised by channel positioning. When the hole runs through a central fossa or cusp, repeated function may lead to microfractures or material fatigue. Additionally, layered ceramics cannot easily accommodate ASC without modifying internal architecture. This adds time and risk to production. Often, the dental laboratory must redesign frameworks, leading to higher costs or weaker results. As such, for highly esthetic zones or complex bite forces, cement-retained solutions remain more practical and visually pleasing.
Zirconia Versus Titanium Dental Customized Implant Abutments: Advantages and Disadvantages
Esthetics and Tissue Compatibility: Zirconia's Leading Role
When esthetics drive treatment planning, zirconia custom abutments offer a significant advantage. Their tooth-like color allows natural light transmission, particularly in anterior restorations. Patients with thin or translucent gingiva benefit from zirconia's visual harmony. Moreover, zirconia is highly biocompatible. Studies show favorable soft tissue responses and reduced plaque accumulation around zirconia surfaces. This contributes to better long-term tissue stability, especially in aesthetic zones.
Also, zirconia resists corrosion, offering excellent longevity. Unlike metal, it doesn't oxidize or discolor the surrounding soft tissue. Its smooth surface also helps minimize bacterial colonization. However, zirconia lacks flexibility under functional load. Fractures may occur under heavy occlusal forces or parafunction. For posterior regions, where bite forces are greater, this risk becomes clinically relevant.
Additionally, machining limitations make fine margin adjustments more difficult. Zirconia requires careful preparation during the design stage at the dental laboratory to ensure passive fit and longevity.
Mechanical Strength and Durability: Titanium's Unmatched Stability
Titanium has long been the gold standard for custom implant abutments due to its exceptional strength. Its ability to withstand occlusal load makes it ideal for posterior implants, long-span bridges, and patients with bruxism. Also, titanium allows for precise interface design with the implant platform. Its machinability ensures accurate fit, which contributes to reduced micromovement and improved load distribution. This precision reduces the risk of screw loosening.
Furthermore, titanium components provide flexibility during clinical adjustment. If minor occlusal interferences occur, clinicians can adjust titanium with a bur—something not advisable with zirconia. However, titanium's metallic color may show through thin or scalloped gingiva. This is especially problematic in aesthetic zones or in patients with high smile lines. In such cases, gray shading compromises the visual outcome.
Additionally, titanium's oxide layer may interact with soft tissues differently. Some studies suggest slightly more plaque accumulation compared to zirconia, which the dental laboratory must consider during material selection.
Material Selection Based on Clinical Zone
Material choice should reflect the implant's location and functional demand. In posterior regions where strength and resilience are critical, titanium typically outperforms zirconia. It tolerates repeated stress without compromising the abutment-implant connection. Also, titanium is preferred when using angled screw channels. Because of its structural toughness, it can support directional force without chipping. This flexibility is especially useful for restoring tilted implants in compromised bone conditions. On the other hand, in the anterior zone—where esthetics and soft tissue integration matter more—zirconia becomes the material of choice. Its color and translucency blend with all-ceramic crowns for a seamless result.
Moreover, zirconia allows better emergence profile customization in narrow ridges or limited interproximal space. Thissupports tissue contouring and papilla formation. When paired with an all-ceramic crown, zirconia produces natural-looking results that a dental laboratory can optimize in CAD software.
Cementation and Crown Compatibility
Crown material and cementation strategy also influence abutment selection. For cement-retained crowns, both zirconia and titanium can serve as a foundation, but surface treatment protocols differ. Additionally, zirconia's hardness makes it less forgiving during seating. Improper cement removal can lead to marginal gaps or ceramic chipping. Thus, extraoral cementation is often preferred to avoid complications.
Moreover, bonding to zirconia requires specific primers and surface conditioning. Titanium, by contrast, is compatible with a wider range of cements and protocols, offering greater flexibility during clinical procedures.
Also, hybrid crowns, such as those with titanium bases and zirconia overlays, combine both materials' benefits.
These abutments offer titanium's strength at the implant interface and zirconia's esthetics supra-gingivally. A skilled dental laboratory, such as The Art of Aesthetics, can design such hybrid solutions with optimal performance.
Cost, Turnaround, and Lab Processing Considerations
Cost and production efficiency also differ. Titanium abutments are generally more affordable and quicker to produce. Their ease of milling and post-processing makes them ideal for high-volume cases.
Also, titanium's processing involves fewer sintering steps, reducing chairside wait times. For full-arch or multi-unit cases, this turnaround advantage becomes significant in treatment planning. However, zirconia abutments require additional lab time. Post-milling sintering, coloring, and polishing are labor-intensive. Yet, the aesthetic payoff in high-visibility areas often justifies the extra steps. Moreover, inventory costs differ. Titanium blanks are generally less expensive and more widely available. Zirconia requires specific block sizes and translucency levels, impacting stocking and pricing.
When Zirconia-Titanium Hybrid Dental Implant Abutments Are Preferred by The Art of Aesthetics Dental Laboratory.
Combining Strength and Esthetics in One Abutment.
Zirconia-titanium hybrid abutments combine the mechanical strength of titanium with the esthetic qualities of zirconia. They are often chosen when neither material alone provides an ideal solution. In high-demand zones—both aesthetically and functionally—hybrid abutments present a balanced alternative. Typically, these abutments feature a titanium base that connects to the implant platform. This ensures a strong, precise interface with minimal micromovement. A zirconia sleeve is then fused or bonded to the titanium base, forming the visible, supragingival portion.
Additionally, the zirconia overlay enhances tissue coloration, particularly under thin or translucent gingiva. This allows better blending with all-ceramic crowns, maintaining esthetic integrity. From the perspective of the dental laboratory, hybrid abutments offer greater design freedom compared to monolithic titanium.
Moreover, by separating the functional and esthetic components, hybrid abutments allow clinicians to meet both biomechanical and visual demands in a single unit.
Preferred for Esthetic Zones with High Occlusal Stress
In anterior areas where esthetics are critical, zirconia is the obvious choice. However, when patients exhibit parafunctional habits or high occlusal loads, pure zirconia abutments risk fracture. Hybrid abutments mitigate this concern by anchoring zirconia to a titanium base.
Additionally, the titanium insert absorbs stress at the implant-abutment interface. This protects the more fragile ceramic portion above the gingiva. The zirconia then handles the esthetic contouring, emergence profile, and crown support.
Also, hybrid designs prevent aesthetic compromises caused by gray shine-through. The zirconia sleeve masks the metallic titanium base while still benefiting from its durability. Moreover, cases involving thin mucosa or high smile lines benefit significantly from hybrid abutments. A dental laboratory can contour the zirconia sleeve to optimize tissue support and symmetry with adjacent teeth. Thus, this combination is ideal when anterior beauty and posterior-level strength are both required.
Useful in Digital Workflows and CAD/CAM Fabrication
Modern CAD/CAM systems are well-suited for hybrid abutment design. Pre-fabricated titanium bases are digitally matched with milled zirconia sleeves. This workflow increases reproducibility and shortens turnaround time. Also, many implant companies offer standardized titanium bases for common platforms. The lab then mills the zirconia part and bonds it to the base using high-strength resin cement or thermal fusion, depending on system compatibility. Furthermore, the modular nature of hybrid abutments reduces remakes. If the zirconia sleeve fractures during try-in or final insertion, the titanium base often remains intact. The lab can simply re-fabricate the zirconia portion and reattach.
Additionally, the dental laboratory benefits from reduced risk of fit issues. The titanium base ensures precision seating into the implant interface, eliminating discrepancies that can arise from full-ceramic interfaces.
Therefore, digital workflows with hybrid abutments enhance both speed and precision without sacrificing esthetics or function.
Suitable for Cement-Retained or Screw-Retained Designs
Hybrid abutments are versatile. They can be used for both cement-retained and screw-retained restorations. In cement-retained cases, the zirconia portion is designed to create a favorable emergence profile and margin placement. Moreover, the titanium base ensures a precise fit with the implant while allowing consistent height control. This predictability aids in margin exposure and cement cleanup, reducing the risk of peri-implantitis.
In screw-retained designs, angled screw channel solutions can be incorporated. The titanium insert handles torque delivery, while the zirconia portion maintains the esthetic surface. This combination ensures strength at the base and beauty on top.
Also, because the titanium base is pre-fabricated, insertion torque values are standardized. This supports safe and repeatable seating of the restoration. From the dental laboratory's viewpoint, this simplifies verification and final adjustment. Thus, dentists can select retention methods based on case needs without compromising material performance.
Ideal for Limited Interocclusal Space
Space limitations pose challenges for implant abutments. When vertical clearance is minimal, full-zirconia abutments risk fracture, and full-titanium abutments compromise esthetics. Hybrid designs solve both problems effectively. Also, hybrid abutments require less vertical height due to their modular construction. Titanium bases are compact, and zirconia overlays can be milled thin without compromising visibility.
Moreover, the low-profile design still supports proper crown emergence and soft tissue contouring. This allows clinicians to maintain natural-looking restorations even in tight occlusal environments.
Additionally, seating accuracy is enhanced by the titanium interface, reducing chairside adjustments. If zirconia breaks under stress, labs can replace the esthetic portion without removing the implant or redoing the entire abutment. From the dental laboratory perspective, hybrid solutions minimize remakes, material waste, and adjustment time, especially in high-stakes esthetic zones with spatial constraints.
Why CBCT Is Essential for Surgical Guides in Successful Dental Implant Procedures from a Dental Laboratory Perspective
Understanding the Role of CBCT in Implant Surgery
CBCT (Cone Beam Computed Tomography) revolutionized implant dentistry by offering precise three-dimensional imaging. Unlike traditional 2D radiographs, CBCT captures the full volume of the jaw, revealing bone density, nerve locations, and sinus positioning. Also, it enables clinicians to assess bone volume and quality in all dimensions. This is crucial for deciding on implant length, angulation, and diameter. Moreover, accurate imaging prevents complications like nerve damage or sinus perforation.
Additionally, CBCT data supports virtual treatment planning. Dentists can simulate implant placement within software before performing any surgical steps. This digital preview reduces surprises during the procedure.
From the dental laboratory point of view, CBCT provides critical data for designing precise surgical guides. Without this data, guide fabrication becomes a risky approximation. Therefore, CBCT ensures both safety and predictability for all implant cases requiring guided surgery.
Digital Surgical Guide Planning with CBCT
Surgical guides bridge the gap between virtual planning and clinical execution. These devices translate the digital plan into the patient's mouth with millimeter-level accuracy. However, a reliable surgical guide starts with reliable data. CBCT provides the necessary foundation. The software overlays the CBCT scan with an intraoral scan or physical model, aligning soft tissue anatomy with hard tissue landmarks. Also, the technician imports this merged dataset into CAD software. The guide is then designed to control the depth, angulation, and position of the drills during surgery. The process would be impossible without three-dimensional data. Furthermore, the guide incorporates sleeves and stabilizers tailored to the anatomy revealed by CBCT. This minimizes lateral movement and guarantees correct insertion paths. The dental laboratory uses CBCT to fabricate guides that work seamlessly with various implant systems and surgical kits.
Avoiding Surgical Complications with CBCT Planning
Improper implant placement can result in severe consequences—paresthesia, sinus perforation, or implant failure. CBCT minimizes these risks by revealing critical anatomy hidden from standard X-rays. Also, for anterior implants, angulation errors are common without 3D guidance. CBCT-based planning ensures the implant emerges in an esthetically favorable position. Moreover, bone width and height can be misjudged in 2D views. CBCT prevents this mistake by offering cross-sectional views that reflect actual morphology. Planning with inaccurate dimensions increases failure risk.
Additionally, CBCT reveals undercuts, ridges, and bone concavities that influence the surgical approach. Dentists adjust flap design, drilling depth, and even implant selection based on this comprehensive view.
From the dental laboratory's perspective, a guide based on CBCT dramatically improves surgical outcomes and reduces chairside adjustments.
Facilitating Prosthetically Driven Implant Placement
Implants should be placed to support the final prosthetic restoration, not merely where bone allows. CBCT enables this by visualizing bone and allowing prosthetic planning in reverse. Also, the dentist and lab collaborate to align the implant axis with the planned crown or bridge contours. This is only possible through software that merges intraoral scans with CBCT volumes. Moreover, restorations designed before surgery help identify if angled abutments or grafting will be necessary. These decisions are more predictable when implants follow prosthetic contours.
Additionally, screw-retained restorations demand precise channel alignment. CBCT planning ensures the long axis of the implant matches the prosthetic path. The dental laboratory uses this integrated workflow to design custom abutments and restorations that perfectly fit the surgical outcome.
CBCT Enables Full Digital Workflow Integration
Modern implantology increasingly relies on fully digital workflows. CBCT data initiates this process. It synchronizes with intraoral scans, facial scans, and software planning tools. Also, once a plan is finalized, the surgical guide, provisional crown, and even custom abutments can be fabricated before surgery. This drastically reduces treatment time.
Furthermore, real-time planning and communication between the surgeon, prosthodontist, and dental laboratory are possible only because of CBCT integration. Additionally, CBCT supports guided immediate loading. If bone quality appears ideal, a pre-made provisional restoration can be delivered at the time of surgery. The dental laboratory depends on CBCT input to streamline and validate the entire implant workflow—from guide to final prosthesis.
How a Dental Laboratory Does a Custom Shade Pick for an Anterior Tooth
Lighting and Environment Setup
- Natural lighting is essential for accurate shade selection. Use color-corrected lights with a temperature of 5500K for consistency.
- Avoid bright operatory lights or colored walls that may distort perception. The environment must remain neutral, with no bold colors nearby.
- Also, seat the patient upright with lips relaxed. Let the teeth rehydrate before choosing a shade, especially after the removal of temporaries.
- Moreover, the best time for shade matching is in the morning when eyes are fresh. Fatigue affects color perception significantly.
- Use a neutral gray bib or drape to minimize external visual noise. This helps clinicians and the dental laboratory achieve consistent results.
- Always clean the tooth surface prior to shade matching. Plaque or stain alters how light reflects off enamel.
Using Shade Tabs and Photography Techniques
- Shade guides should be clean and replaced regularly. Use the same brand that the lab uses for consistency.
- Also, hold the tab at the same vertical angle as the target tooth. Compare under identical lighting conditions.
- Furthermore, photograph the tab and tooth using a high-quality camera with the shade tab labeled in the frame. Include multiple tabs for contrast.
- Additionally, use a polarizing filter or cross-polarized flash to eliminate glare. This reveals subtle color differences in the tooth structure.
- Take photos from frontal, lateral, and occlusal views. Include a full face with a smile to help the dental laboratory evaluate harmony with facial aesthetics.
- The dental laboratory relies on these images to recreate incisal translucency, internal effects, and surface texture.
Analyzing Hue, Chroma, and Value
- Shade is more than a single color. It involves hue (basic color), chroma (intensity), and value (lightness or darkness).
- Also, begin by selecting value. Use value-specific guides to identify lightness before choosing color. Most perception errors occur in this step.
- Moreover, compare chroma levels by choosing between higher or lower saturation tabs within the same hue family.
- Additionally, note cervical, middle, and incisal thirds separately. Anterior teeth often transition from higher chroma to translucency.
- The dental laboratory uses this detailed mapping to layer ceramics or choose press ingots that best mimic natural dentition.
- Avoid rushing. Let your eyes adjust to ambient light before finalizing selections.
Communicating Characterizations and Surface Texture
Beyond color, surface texture, and special effects define a natural-looking restoration. Document white spots, craze lines, or halo effects clearly.
Also, note the gloss level, whether it's high-polish or matte. These factors impact the final appearance significantly under different lighting. Moreover, describe any gradient in translucency across the tooth. Many anterior teeth show incisal edge translucency or blue-gray opalescence. Additionally, mark these areas on a sketch or digitally on a photo. Use arrows and color annotations for clarity. The dental laboratory translates these notes into internal ceramic layering or external stains to match adjacent teeth. Consistency in terminology and images minimizes the need for remakes or shade corrections.
Patient Involvement and Final Verification
Involve the patient when selecting the shade, especially for visible anterior restorations. Their perception and comfort are vital.
Also, show them the chosen tab and compare it side-by-side. This creates trust and helps manage expectations. Moreover, once selected, send all data to The Art of Aesthetics Dental Laboratory. Include shade tab reference, photographs, and any special notes. Confirm the restoration under the same lighting used during shade selection. Make final adjustments if needed before bonding. The dental laboratory relies on chairside accuracy to craft lifelike restorations, particularly in esthetically demanding anterior zones.
How to Prep Teeth and Bond IPS e.max Crowns: Ideal Preparation Guidelines for Emax Crowns
IPS e.max (lithium disilicate) crowns offer strength and excellent esthetics, but they require precise preparation for long-term success. The ideal prep involves 1.5–2.0 mm of occlusal reduction and 1.0–1.5 mm axial reduction with a defined, smooth shoulder or deep chamfer margin. Avoid under-reducing, especially in incisal and cusp areas. Inadequate space compromises translucency, esthetics, and strength. Feather-edge or knife-edge margins are contraindicated because they weaken the crown's edge and lead to marginal chipping. Also, reduce all surfaces evenly. Uneven thickness can result in color discrepancies or internal stresses during cementation. Use depth cutters and silicone guides when prepping for anterior esthetics. Moreover, provide rounded internal angles to reduce stress concentrations. Sharp corners may cause cracks in the pressed ceramic. Maintain consistent taper and path of insertion for ease of seating. From the dental laboratory perspective, clear, smooth margins and sufficient reduction allow accurate waxing, pressing, and contouring of IPS e.max restorations.
Tissue Management and High-Quality Impressions
Accurate impression capture is essential. If margins are subgingival or surrounded by inflamed tissue, it's nearly impossible to achieve precise crown adaptation. Begin by controlling bleeding and retracting the gingiva with a double-cord technique or retraction paste. Additionally, delay impressions if the tissue is inflamed. A healthy sulcus ensures a well-defined margin in both analog and digital workflows. If using a scanner, dry the area and gently retract the cheeks and lips to avoid scan errors.
Also, confirm that margins are clearly visible from every angle in your scan or impression. Poor detail results in marginal gaps or over-contoured restorations. Check the scan in high-resolution view to identify any data stitching issues. Moreover, take opposing arch scans and bite records for proper articulation. A full occlusal picture allows accurate function simulation during design and milling. The Art of Aesthetics Dental Laboratory relies entirely on the quality of what's sent. Even a perfect crown design fails without proper clinical inputs.
Internal Surface Treatment of IPS e.max Crowns
E.max crowns require specific internal conditioning to bond effectively. First, all our e.max products come pre-etched with 5% hydrofluoric acid for 20 seconds. This creates micro-porosities in the glass ceramic surface, improving micromechanical retention. The etched surface may appear frosty. Avoid touching it with gloves or tools to prevent contamination. If contamination occurs, re-etch briefly and rinse again. Also, apply a silane coupling agent and let it sit for 60 seconds. Silane improves the chemical bond between the ceramic and resin cement. Afterward, gently air dry without rinsing. Moreover, use a bonding-compatible cement system. Dual-cure resin cements are recommended, especially for posterior crowns or where light cannot reach the entire margin.
Try-In Protocol and Esthetic Evaluation
Dry try-in helps identify issues before bonding. Place the crown without cement and check marginal fit, interproximal contact, and occlusion. Adjust as needed with fine-grit diamonds under water cooling. Also, evaluate the shade. IPS e.max crowns are affected by underlying tooth color and resin cement shade. Use try-in pastes to preview the final appearance. These pastes mimic the optical properties of resin cements and guide shade decisions.
Moreover, check how light passes through the crown. Translucent E.max may appear too gray if underlying structures are dark. In such cases, block-out cement or opaquing strategies may be necessary.
Additionally, avoid salivary contamination. If the internal surface becomes contaminated, clean it with phosphoric acid for 30 seconds, rinse thoroughly, and reapply silane. From a dental laboratory perspective, most esthetic failures result from incorrect cement shade or poor tooth prep, not crown fabrication. Dry try-in bridges the gap between lab precision and clinical reality.
Final Cementation and Bonding Process
Isolate the tooth from saliva and blood before cementation. Use a rubber dam or cotton rolls. Even slight contamination compromises bond strength. Begin by applying adhesive to the prepared tooth surface according to the manufacturer's instructions. Also, apply resin cement inside the crown and seat it firmly. Tack-cure for 1–2 seconds to partially set the cement. Then, remove excess with an explorer or micro-brush.
Moreover, fully light-cure all accessible margins for 20–30 seconds per surface. For deep or shaded areas, use dual-cure systems. Consistent curing prevents marginal staining or debonding later.
Additionally, check occlusion carefully. Even a slight high spot on ceramic can lead to a fracture over time. Polish any adjustments with ceramic-specific finishing systems. The dental laboratory ensures proper fit and aesthetics. Final success depends on technique-sensitive bonding and isolation during placement.
How to Prep Teeth and Bond Zirconia Crowns. A Proper Tooth Preparation
To ensure successful zirconia restorations, proper tooth reduction is essential. Zirconia is strong but requires even thickness for predictable outcomes. Ideal preparation involves approximately 1.5 mm occlusal reduction and 1.0 mm axial reduction. A smooth, rounded chamfer or shoulder margin is preferred. Avoid feather-edge margins, as they compromise material strength and adaptation. Also, sharp internal angles should be avoided. These stress points can lead to ceramic fracture, especially in thinner restorations.
Moreover, use depth-cutting burs to guide consistent reduction. Uniformity ensures even crown thickness and esthetic translucency. For monolithic zirconia, minimal reduction is sufficient. For layered or high-translucency types, slightly more clearance is required. Additionally, preserve as much enamel as possible. Bond strength to enamel is higher than to dentin. From a dental laboratory viewpoint, clean and clearly defined margins reduce remakes and adjustments. Thus, ideal prep sets the foundation for optimal restoration fit, strength, and esthetics.
Soft Tissue Management and Final Impression
Accurate margin capture is critical for zirconia crowns. Any soft tissue interference leads to poor adaptation. Begin with gingival retraction using a double-cord technique or hemostatic paste. Also, make sure the field is completely dry. Moisture disrupts both scanning and traditional impression material. When using intraoral scanners, retract the cheeks and lips to avoid stitching errors and blurry margins. Furthermore, digital scans must show the entire circumferential margin clearly. Rotate and inspect in high resolution. If using analog impressions, choose a light-body-heavy-body combination for precision and tear strength.
Moreover, trim provisional crowns carefully to avoid inflammation. Poor tissue health at delivery complicates bonding and esthetics. A well-contoured provisional encourages tissue healing around the final restoration. From the dental laboratory perspective, accurate impressions or scans directly impact fit and seating time. Labs must interpret digital data or stone models without guessing where the margin lies.
Therefore, soft tissue and moisture control are as vital as tooth preparation itself.
Internal Surface Treatment of Zirconia Crowns
Zirconia's chemical structure makes it resistant to conventional etching. Instead, surface conditioning requires specific protocols to improve adhesion. All our zirconia products are sandblasted with 50-micron alumina particles at 1–2 bars of pressure. However, to allow in-clinic customization or adjustment, zirconia crowns are not primed.
Proper surface prep bridges clinical work and lab fabrication seamlessly. Contaminants like saliva or phosphate-containing paste interfere with bonding. Also, apply an MDP-containing primer. This creates a chemical bond between the zirconia surface and resin cement. Without MDP, most adhesive systems won't adhere to zirconia effectively.
Moreover, avoid using hydrofluoric acid. It has no beneficial effect on zirconia and poses unnecessary risk. For clinicians who prefer self-adhesive resin cements, ensure compatibility with zirconia protocols and surface pre-treatment. A well-prepared internal surface simplifies cementation and improves long-term bond durability.
Try-In and Pre-Bonding Evaluation
Before bonding, always conduct a dry try-in. Check marginal fit, proximal contacts, and occlusion without cement first. Adjust as needed using a fine diamond under water spray to avoid microcracks. Also, verify shade under natural lighting. Zirconia's translucency can vary by thickness and type. Use try-in paste to preview final aesthetics if using translucent materials. If using opaque zirconia, the shade match may be less sensitive.
Moreover, recheck seating with pressure. Improper prep angles can prevent full seating. Rely on tactile feedback rather than assuming digital fits always align in the mouth. Additionally, avoid contaminating the internal surface during try-in. If contaminated, re-clean using Ivoclean or sodium hypochlorite before bonding. Salivary phosphates reduce MDP bonding strength significantly. From the dental laboratory standpoint, most crown misfits stem from unnoticed try-in errors, not lab fabrication. Careful evaluation prevents last-minute complications. Therefore, try-in is not optional—it's essential for success.
Final Bonding and Cementation Protocol
When ready to cement, isolate thoroughly. Use a rubber dam or cotton roll isolation at a minimum. Any contamination affects bond strength and longevity. Also, reapply MDP primer to the cleaned, dried internal surface. Some primers require air drying, while others need light curing. Follow the manufacturer's instructions carefully.
Moreover, select the appropriate resin cement. Self-adhesive cements are convenient but may offer lower bond strength. Total-etch or self-etch systems with dual-cure resin cements provide higher adhesion if used correctly. Additionally, apply cement evenly inside the crown. Seat the crown with firm, steady pressure and remove excess at the gel stage. Light cure from all accessible angles. Use floss and an explorer to check for interproximal cement. Any residue may lead to tissue inflammation or food impaction. Once cured, finish margins with fine polishers and confirm occlusion again. From a dental laboratory point of view, proper cementation preserves fit integrity and esthetics. Thus, careful bonding ensures the crown functions and looks its best.
Do not use conventional glass ionomer or zinc phosphate cements for zirconia — they don't bond chemically and will lead to early debonding.
How to Scan with 3Shape TRIOS Intraoral Scanner
- Proper setup is essential for accurate scanning with the 3Shape TRIOS. Calibrate the scanner according to the manufacturer's instructions if prompted.
- Also, ensure the scanning tip is clean and dry. A foggy or dirty lens reduces accuracy and causes scan noise.
- Moreover, adjust operatory lighting to reduce reflections and shadows. Soft, neutral light helps in capturing true colors and details.
- Position the patient upright and retract cheeks, lips, and tongue effectively. A dry and visible field enhances scanning precision.
- The scanning sequence must be smooth and uninterrupted. Glide the scanner with consistent speed over each surface.
The dental laboratory relies on high-quality digital impressions to produce precisely fitting restorations every time.
Effective Arch Scanning Techniques
- Begin scanning from the occlusal surfaces, then proceed to buccal and lingual sides in a fluid motion.
- Also, follow the TRIOS software's path guidance. These animations help minimize common errors like overlaps or voids.
- Moreover, scan one quadrant at a time and check for missing data. Zoom in to inspect critical regions such as margin lines.
- Additionally, rotate the scanner head as needed to capture difficult posterior or interproximal areas.
- Rescan any regions with voids or poor resolution immediately. A perfect scan reduces remakes and chairside adjustments.
The dental laboratory expects a clean, uninterrupted scan file with all relevant anatomical data captured.
Capturing Occlusion and Bite Registration
Accurate occlusal relationships begin with correct bite positioning. Guide the patient into centric occlusion without excessive force.
- First, use bilateral buccal scans to register both sides. This redundancy allows software to match upper and lower arches more reliably.
- Then, confirm that all cusp tips and occlusal surfaces are clearly visible in the scan.
- Additionally, minimize scanner motion during bite capture. Let the scanner rest briefly to allow full frame stitching.
- Verify occlusion with the preview tool before finalizing. Look for contact alignment and symmetry.
From a dental laboratory point of view, poor occlusion records often lead to articulation errors in final restorations.
Avoiding Common Errors in TRIOS Scanning
TRIOS scans can suffer from voids, scan drift, or stitching artifacts. These are typically due to poor retraction or scanning too quickly.
- Avoid scanning over reflective surfaces like gold or amalgam without matte spray. Reflection distorts scan data.
- Also, use two-handed scanning or a dental assistant for retraction, especially when scanning posterior regions.
- Then, stay close to the tooth surface. Excessive distance can cause missed details or scan loss.
- Review each arch from multiple angles. Look for missing margins, jagged edges, or double contours.
The dental laboratory appreciates when clinicians take time to ensure each scan is complete and clean.
File Submission and Communication Protocols
Once the scan is complete, preview all surfaces for accuracy. Margin clarity, soft tissue, and occlusion should be double-checked. Also, annotate special instructions in the TRIOS order form—shade details, prep concerns, or restoration preferences. Moreover, use intraoral photos for shade matching and surface texture if esthetics are involved. Further, confirm that the scan is synced and received by the dental laboratory using 3Shape Communicate. Include full arch scans, bite registrations, and opposing scans, even if restoring a single unit. The dental laboratory depends on detailed scan data and communication to create accurate, esthetic, and functional restorations.
What's the Best Way to Scan iTero. Scanner Preparation and Operator Technique
Start by calibrating the iTero scanner if prompted. A properly calibrated scanner ensures image accuracy and prevents distortion.
- Clean the scanning tip with isopropyl alcohol before use. A clear lens improves image quality. Use barrier sleeves to prevent fogging.
- Also, position the patient comfortably and ensure adequate lighting in the operatory. Adjust the headrest to optimize arch visibility.
- Avoid introducing saliva or blood into the scan field. Dry the area gently with air or cotton rolls. Moisture interferes with stitching algorithms.
- Scan in a continuous, steady motion. Avoid jerky hand movements or retracting the scanner mid-pass. These create errors in data stitching.
From a dental laboratory standpoint, poor scanning habits frequently result in inaccurate models and misaligned restorations.
Best Practices for Full-Arch Scans
Begin full-arch scans from the occlusal surface, then move to buccal and lingual sides in a systematic order. This promotes consistent data stitching.
- Overlap scan paths slightly. Redundancy increases accuracy and reduces the chance of missed areas.
- Also, avoid scanning across shiny metal restorations too quickly. Reflective surfaces confuse the scanner's sensors.
- Be sure to inspect the live scan for holes or stitching errors in real time. Don't wait until submission to review the scan quality.
- Always capture all relevant soft tissues, such as the gingival margins and interdental papillae. These details matter during crown design.
Finally, be sure to transmit the image to The Art of Aesthetics Dental Laboratory. We are not responsible for the due date or other complications due to failed transmission to us. However, we will do our best to accommodate you as best as possible to meet your needs.
Capturing Bite and Occlusion Accurately
Accurate occlusal scans depend on correct bite registration. Use articulating paper to verify patient occlusion before scanning.
- Also, instruct the patient to close gently into maximum intercuspation. Excessive force may distort bite accuracy.
- Moreover, scan buccal bite registrations on both sides for redundancy. This allows software to match upper and lower arches correctly.
- Additionally, avoid moving the scanner too fast across occlusal surfaces. Take time to ensure all cusp tips are visible.
- Visually confirm that cusp-to-cusp and fossa relationships are recorded. Look for contact areas, not just contact points.
Inaccurate occlusion causes major issues with the dental laboratory restoration.
Common Pitfalls and How to Avoid Them
- Incomplete margins, scan streaks, and dropped data are common mistakes when using intraoral scanners. These often stem from poor retraction or insufficient lighting.
- Also, avoid scanning through a mirror. While it may seem efficient, it introduces reflections and degrades quality.
- Moreover, retraction is critical, especially for posterior scans. Use a two-handed technique or an assistant to expose all surfaces.
- Additionally, watch for scan lag or freezes during fast movements. Pause and resume only when the scanner reorients properly.
- Check for model irregularities immediately after finishing. Rescanning a small area is faster than troubleshooting lab errors.
The dental laboratory appreciates when scans are delivered clean, complete, and with conspicuous margins.
Optimizing File Submission and Communication
Finalize scans only after full verification. Use the iTero preview feature to rotate and zoom in on margin lines.
- Label the scan correctly with the patient's name and procedure. Mislabeling leads to delays and errors in lab production.
- Also, include technician notes for special requests—shade, prep concerns, or material preferences.
- Be sure to attach intraoral photos or shade guide images if esthetics are important. Visual references improve restoration accuracy.
- Confirm that the scan was transmitted and received by the dental laboratory. Use the iTero dashboard or follow-up message.
How to Double Check Digitally Scanned Dental Impressions and Make Sure They Are Acceptable Before Transmitting to the Dental Laboratory
Always Begin with a Full-Arch Overview and Margin Visibility
Before transmitting any digital scan, always evaluate the full-arch model to ensure no data is missing. Rotate the scan from every angle. Check both occlusal and lingual views. The lab must see the complete anatomy to fabricate accurately. Zoom in on preparation margins. Look for clean, sharp edges without fuzziness. If tissue or saliva obscures detail, rescanning that area is often better than editing. A jagged or incomplete margin leads to remake risk.
Additionally, inspect the scan in grayscale mode if your software allows it. This highlights edge contrast and reveals surface detail more clearly. Make sure no stitching errors or overlaps exist near the prep.
Also, compare the preparation scan with the adjacent teeth. Verify parallelism and taper. Discrepancies can indicate scanner misalignment or improper retraction during scanning. Thus, validating the scan for visual clarity ensures the dental laboratory receives accurate, complete impressions.
Confirm Bite Registration and Occlusal Clearance
Digital scans often fail to capture proper occlusion, especially if the patient bites prematurely or unevenly. Always check the occlusal relationship using the bite scan preview tool. Confirm that contact points align and there are no visible distortions. Also, examine vertical clearance. If the patient's opposing arch is too close to the preparation, restorations may not have enough space. Use the software's distance measurement feature to calculate occluso-gingival room, typically 1.5–2 mm for most restorations.
Moreover, occlusion must match the patient's natural centric bite. Sometimes bite scans are captured with the patient's jaw shifted forward or to the side. These distort true occlusal relationships and affect the prosthetic fit. Furthermore, verify that bite scans include at least two teeth anterior and posterior to the prepped area. This triangulation supports accurate articulation at the dental laboratory.
Evaluate Soft Tissue and Scan Path Accuracy
Gingival health and retraction quality play a major role in scan acceptance. Even the best scanner cannot capture margins if tissue covers them. Before scanning, use retraction cord or paste as needed. After scanning, zoom in to inspect subgingival regions carefully.
Additionally, watch for shiny or reflective areas in the digital scan. These usually appear near moist tissue or metallic restorations. Reflections confuse scanner sensors and result in patchy data. Dry thoroughly before rescanning reflective zones.
Also, avoid excessive stitching errors. When scan paths jump or loop, you may see breaks in the digital model. These manifest as doubled contours or holes. Most scanners provide a "scan history" or "scan path" view that shows operator motion during capture. In addition, avoid dragging the scanner too quickly across the arch. Slow, overlapping sweeps yield better resolution and reduce errors. A properly captured scan reduces correction time at the dental laboratory.
Use Color and Detail Tools to Review Accuracy
Your scanner's software likely includes color indicators to highlight scan quality. Use these tools. Areas that appear in red or orange usually indicate thin or missing data. Green typically represents accurate, high-confidence capture zones. Additionally, toggle between full-color and monochrome views. Sometimes, color scans hide edge details. Monochrome, especially grayscale, enhances margin inspection. Don't rely solely on what "looks good" in color mode. Also, rotate models under virtual lighting. Adjust brightness or light direction to simulate clinical inspection. This reveals undercuts or overhangs that are not visible in default views. Use digital calipers to measure prep length and axial wall taper.
Furthermore, check scan resolution settings. Higher settings improve surface detail but increase file size. Choose based on prep complexity. For anterior esthetics, always use maximum resolution. This gives the dental laboratory more information to build lifelike results.
Verify File Labels and Case Completeness Before Sending
Even the best scan becomes useless if files are mislabeled or incomplete.
Before exporting, double-check that all files are attached—prep arch, opposing arch, bite scan, and any additional views.
Also, label the files clearly with patient name, date, arch, and restoration type. Avoid ambiguous titles like "scan1" or "final." A disorganized submission delays case start and increases the risk of mismatched components. In addition, include case notes and shade information in a structured format. Your software should allow attachment of digital Rx forms or PDFs. Be specific with preferences—material, finish line type, margin location, and restoration shade. If unsure, please email us your detailed notes.
Additionally, always preview the scan from the lab's perspective. Many software platforms offer a "lab view" mode that mimics how the model will appear in design software. This step catches last-minute errors.
Therefore, when organized properly, we receive complete, labeled, and clinically useful digital impressions. When all the above tasks are performed, you can discharge your patient and transmit the digital impression to The Art of Aesthetics Dental Laboratory.
The Art of Aesthetics Dental Laboratory Ships Around the Globe. Our Regular Clients Don't Pay for Shipping.
Shipping dental restorations across borders used to be a risky and slow process. Today, technology and logistics have changed that reality. Our dental laboratory has built a global shipping system that ensures timely delivery, whether you're in New York or Switzerland. Dental clinicians deserve high-quality work regardless of location. By investing in international courier networks and time-zone-aligned customer service, we ensure your cases arrive intact and on time. Packaging materials are custom-fit to protect delicate prosthetics without bulk or waste. Additionally, we monitor each shipment with real-time tracking and offer dedicated shipping support. If delays occur, clients receive immediate updates and resolution options. This level of transparency builds trust and eliminates guesswork from your workflow. So wherever you practice, our dental laboratory extends your reach without compromising reliability or efficiency.
Loyalty That Rewards Your Growth
Beyond shipping everywhere, we go a step further for our loyal clients. Regular customers never pay for shipping, period. This isn't a limited promotion; it's a permanent benefit designed to support your bottom line.
Moreover, free global shipping helps streamline your budget planning. Unexpected courier fees disappear, and what remains is predictable, seamless logistics. While other vendors may add fees per box or by region, we keep it simple. For high-volume practices, those savings grow rapidly. Over the years, waived shipping costs often equal the price of an additional case. As a result, many of our partners view this service as a built-in investment return. Meanwhile, our dental laboratory continues to improve transit efficiency while maintaining this no-cost promise.